On December 20, Sarah Rushford from our West Allis/Wauwatosa Center was on Real Milwaukee to talk about fun holiday projects you can do with your kiddos. If you missed this segment please visit: https://www.fox6now.com/real-milwaukee/easy-holiday-crafts-to-do-with-your-family
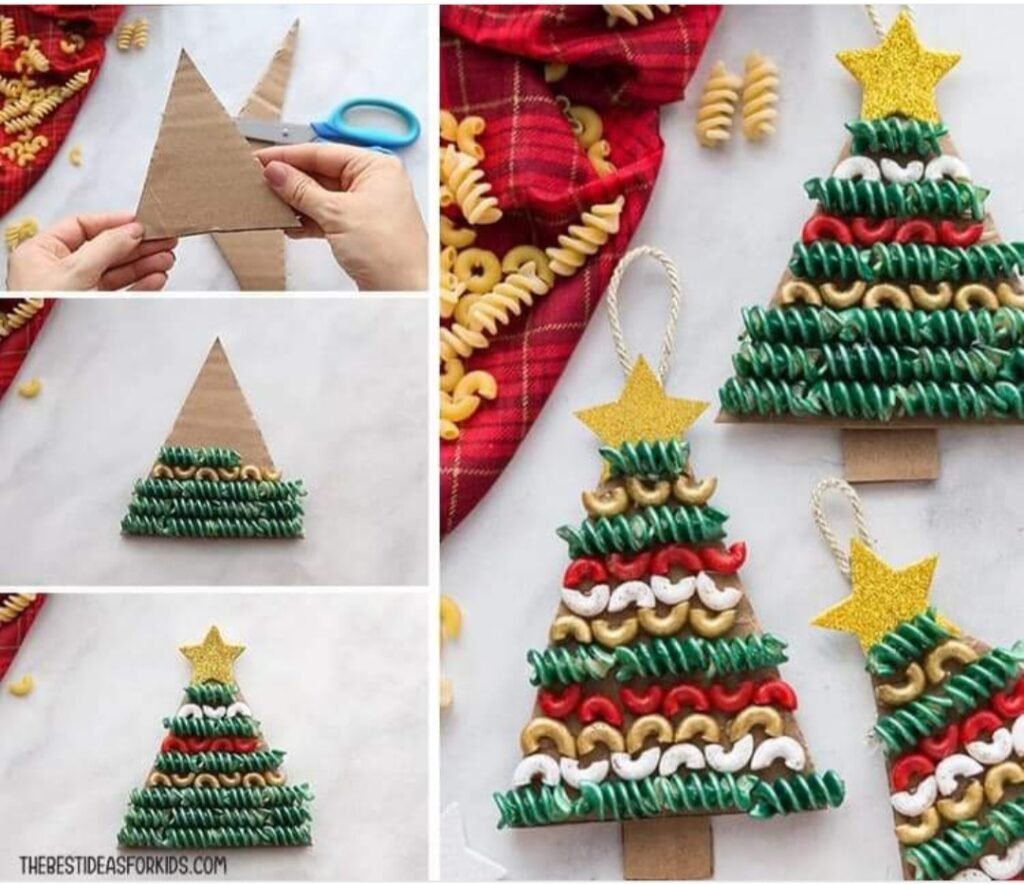
Noodle Ornaments
Supplies:
Fusilli Noodles
Macaroni Noodles
Small gold glitter stickers
Glue
White cardstock
Acrylic paint (green, white red and gold)
Cardboard
Twine, yarn or ribbon
Instructions
1. Paint the noodles (add a bunch of noodles in a bag, add paint and squish the paint on the noodles.
2. Trace a triangle shape from the cardboard and cut it out.
3. Glue noodles on cardboard until itis full.
4. Add gold glitter star to top
5. Cut out small rectangle piece of cardboard and glue to the bottom.
6. hot glue piece of twine, yarn or ribbon to the top of the star for hanging.
Source: – https://www.thebestideasforkids.com/christmas-tree-pasta-macaroni-craft/
Foot Ornaments
Supplies:

Supplies:
- 1 cup flour
- 1 cup salt
- ½ cup warm water
- 6-8 Pipe cleaners cut up into pieces
- Acrylic paint
- Hot Glue
- Puff paint/ sharpie
- Ribbon
- Mod podge
- Mini pom poms
Instructions:
- Pre-heat oven to 250 degrees.
- In a mixing bowl, add the water, salt, and flour to combine. Knead with your hands to get it all smooth. Use a rolling pin and roll it out flat.
- Have your child press their foot into the dough then use a knife and cut around the edges.
- Bake in the oven for 2 hours then let them cool. Once cooled, paint them with brown acrylic paint. Let them dry a bit and put together the antlers with pipe cleaners.
- Hot glue the pipe cleaners on the back and the nose. Use black puff paint or sharpie for the mouth and eyes. Make a loop for the ribbon and hot glue that to the back as well.
- Finish with a coat of mod podge or a clear coat spray to seal it.
Source: https://www.craftymorning.com/salt-dough-footprint-reindeer-ornaments/
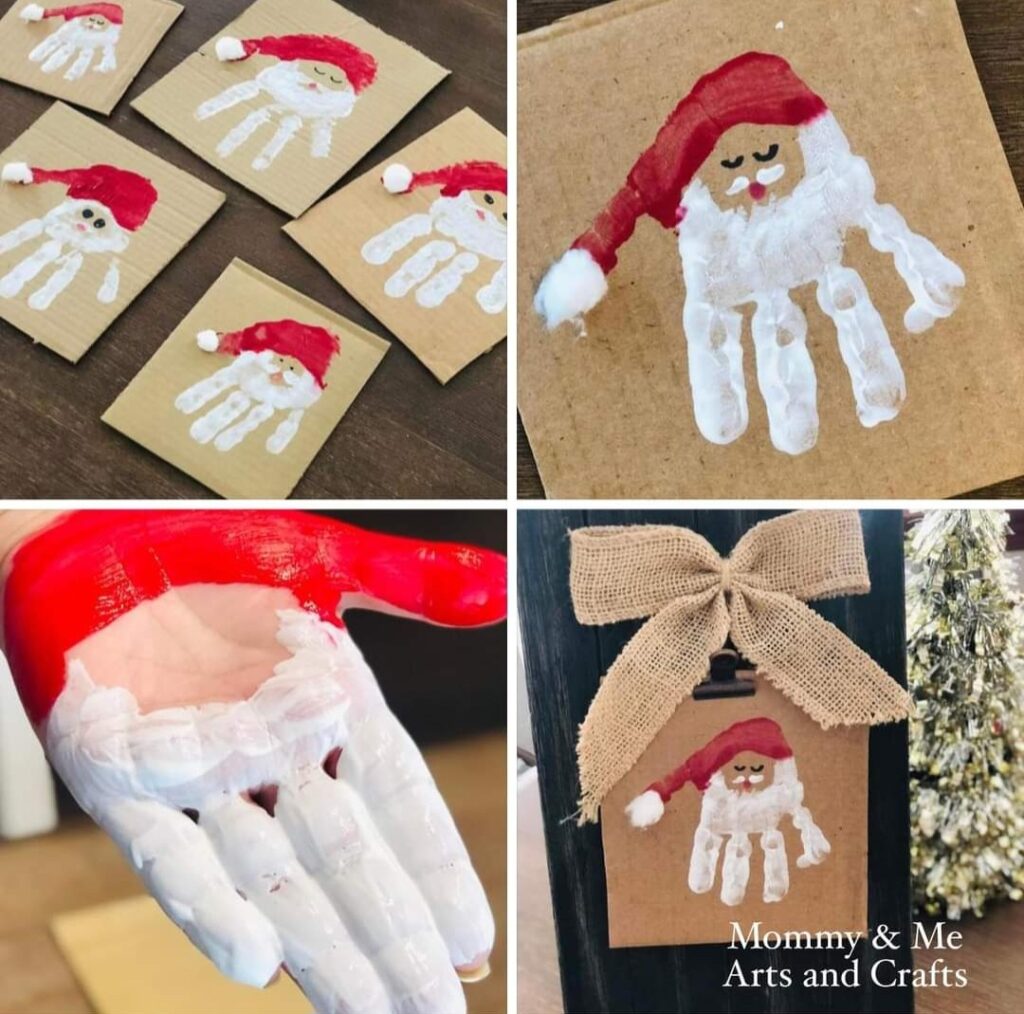
Hand Ornaments
Supplies:
- Plain bulb ornaments
- White acrylic paint
- Paint brush
- Little hands
- Tinsel to fill your ornament if it is clear
- Permanent markers to draw on embellishments
- Felt to glue on scarves it you want
- Hot glue
Instructions:
1. Carefully paint your kids’ hands
2. Have them carefully ‘grab’ the bulb, being careful not to move their fingers. Let bulb dry
3. Use markers or acrylic paint to draw on embellishments: Scarf, hat, eyes, buttons, nose, arms
4. Write their name and year onto the palm of each ornament and hang on tree, or give as gifts!
Source: https://www.confessionsofahomeschooler.com/blog/2011/12/handmade-handprint-ornaments.html
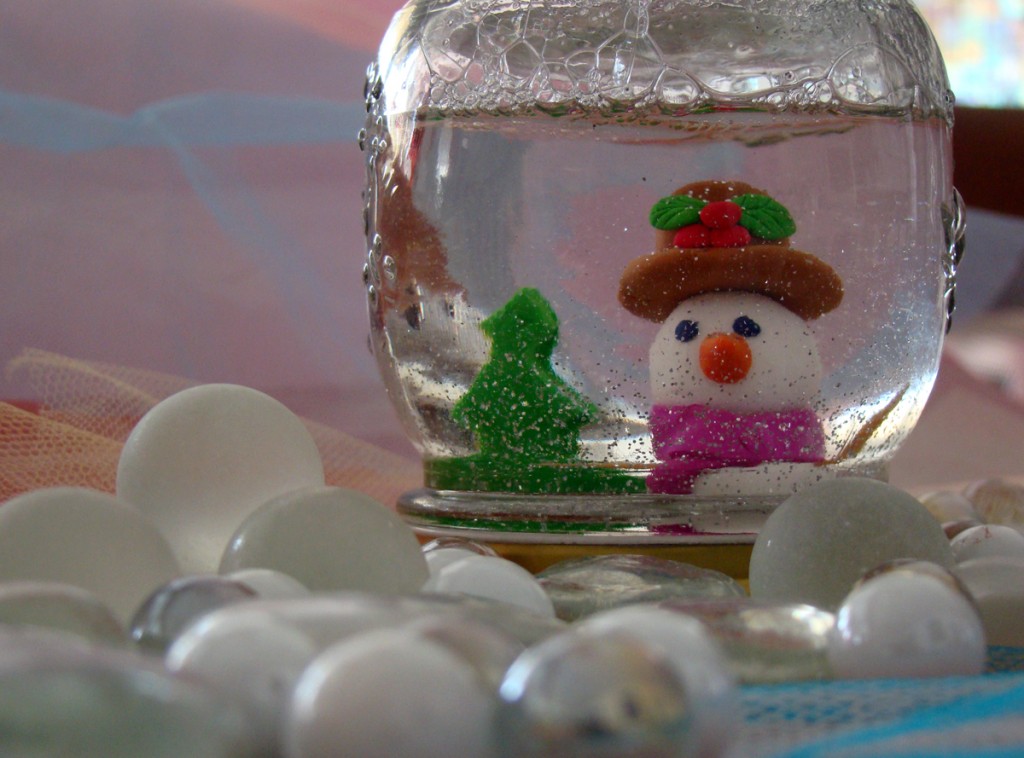
Snow Globes
Supplies:
- Empty glass jar
- Baby oil
- Silver glitter
Then, considering purchasing these types of materials to create a winter scene:
- Polymer clay (like FIMO)
- A few glass pebbles
- Super glue
- Cookie cutter (small tree shape)
- 1. Place a few glass pebbles inside the lid of the glass jar and use super glue to secure them in place.
- 2. Use polymer clay to make the figures you wish to put in your snow globe. Use a small cookie cutter to make the shape of a small tree. If you don’t feel comfortable with your “sculpting” skills, then go through your Christmas ornaments. You will certainly find miniature snowmen, Santa, trees, etc. Use these instead.
- If you use polymer clay, follow the instructions for baking. Once your figures are ready, glue them on the pebbles you have already put in the lid of your jar. Make sure the figures you make are small enough to fit in the jar when it is sealed.
- 3. Fill the jar with baby oil (leave about 1/4 inch empty). Drop about half a teaspoon of glitter into the baby oil.
- 4. Once the glue is dry place the lid and seal the jar securely. Then Let the jar stand on its lid and watch the snow fall!
- Note: If your jar leaks, use silicone to seal it. Once it is dry, wrap a ribbon around the lid to hide the silicone.
Source: https://momitforward.com/easy-crafts-make-your-own-snowglobe/
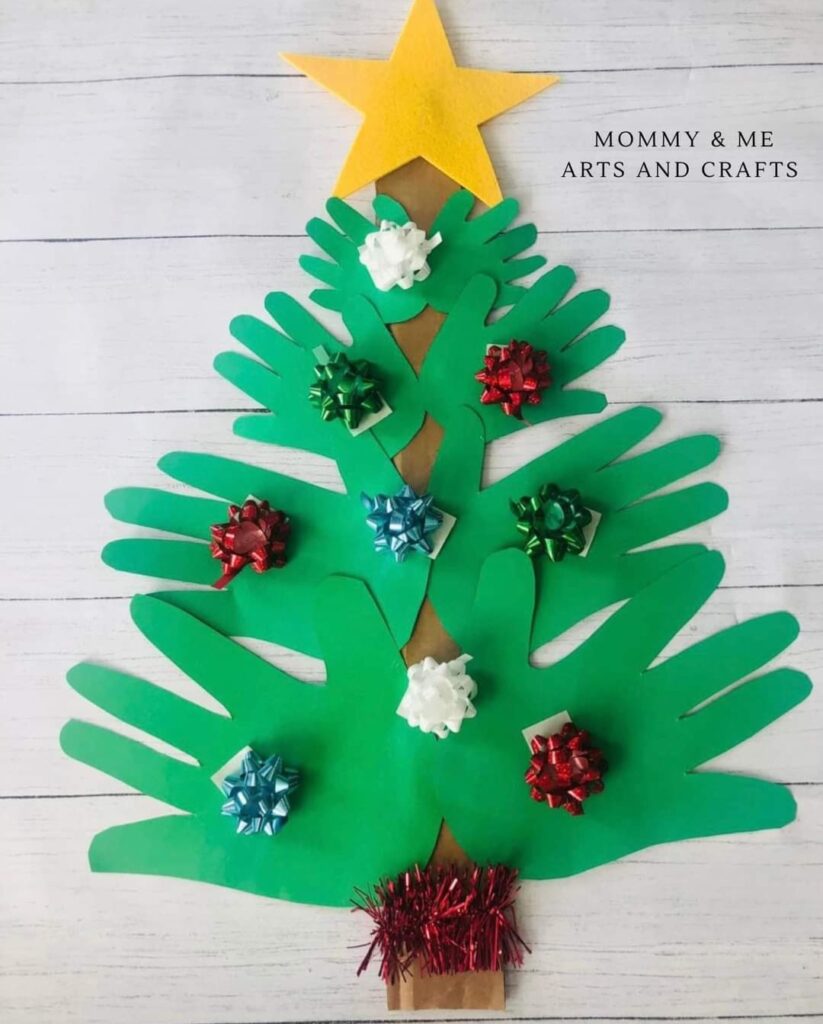
Hands Tree
Supplies:
Green, brown and yellow construction paper
Scissors
pencil
Glue
mini bows
Garland or ribbon
Instructions:
1. Using a pencil trace dad’s mom’s and child’s hands on green construction paper. Cut them out.
2. Cut a brown strip of paper for trunk.
3. Cut a star out of the yellow paper.
4. Glue hands from largest to smallest up the trunk
5. Add bows and garland
6. Glue star to top of the tree
